5 Tips for Better iPhone Photos
Real talk: I have a love/hate relationship with my phone. Being a photographer, it can feel discouraging when anyone now has access to a craft you have worked so hard at trying to hone. Even campaigns are being shot on the iPhone. But the Mother/realist/human in me also understands the convenience and am someone who takes iPhone photos every single day. In fact, I am impressed by the advancements in technology that have allowed better quality and given more opportunity for people who don't want or can't own a camera, but still appreciate a good photo. (Looking at you, glorious portrait mode!)
That being said, it can be ovewhelming learning how to navigate these tiny robots we carry around. And believe it or not, I often am not bringing my actual camera out and about, especially on outings with my family or vacation.
So how do we continue to make memories that we are proud of, all with what we have in our back pocket?
Allow me to share my favorite 5 foolproof tricks that anyone with an iPhone can implement…
1. TAP THE SCREEN : SLIDE EXPOSURE | I remember when I first discovered this on accident. (Insert 'mind-blown' gesture here.) It is so simple but often times easily missed. Our smart phones are just that, and will adjust according to where the focal point is and will adjust to what light is surrounding it. You may have even tapped around on your screen before to focus on something, but it still is reading too bright or too dark. Take that same index finger and where you see the ‘sun’ icon, or exposure, slight it up/down, or side to side, depending on where it is.
This will allow you to get a more desired exposure and also require less tweaking when you go to edit it later!
2. RULE OF THIRDS: USE YOUR GRID TO CREATE COMPOSITION |The age old rule of Photgraphy is still a relevant rule for a reason, and this does not just apply to cameras! In fact, it’s still so relevant that our phones come with a built-in grid to help us practice it! I am sure you have it turned off (I do about half of the time, too) but it can really help you if you are wanting inspiration with composition. Not all photos need to be straight on. Look at the photos above, for example. I loved the reflection that our front door window was casting on the wall, but could do without the mess on the floor and in the background. Using the rule of thirds in the grid inspired me to frame it without showing the bottom, and moving it flush to the right. So simple, yet it changed the whole photo.
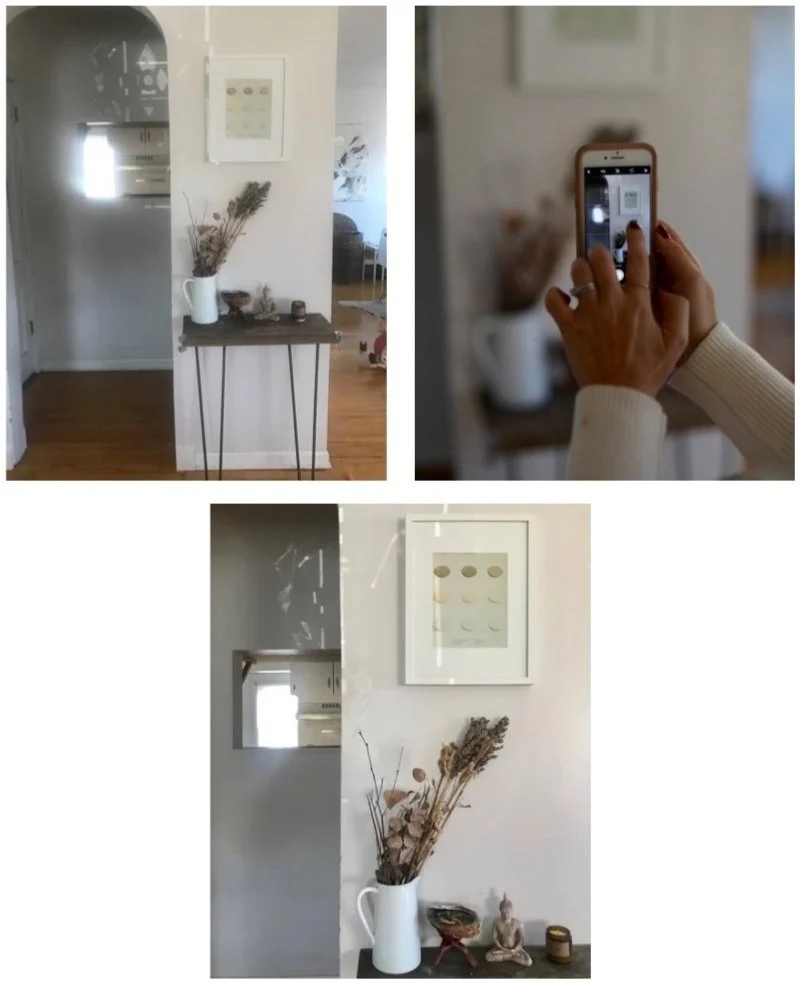
(Top left: BEFORE, Top Right: DURING, Bottom: AFTER)
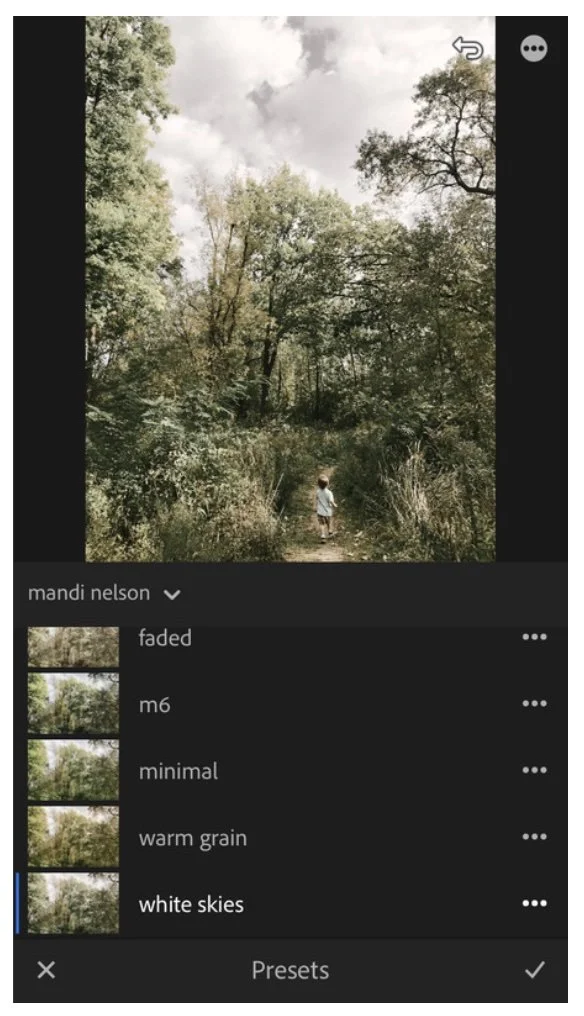
3. Presets: Lightroom App | Oh, Presets. Bless you. We are seeing them pop up everywhere, especially from folks selling their versions of them. But they are popular because they are a time saver, especially the case when it comes to mobile presets. Do some research and figure out which ones match your style best. I personally love the aesthetic of Mandi Nelson’s, but there area a ton out there depending on your style! Take it a step further and make tweaks –– rarely does one click fit all, and you will likely want to make a couple of changes to suit your style. But to achieve the desired look you are going for, these can really elevate your photos and above all, save you time!
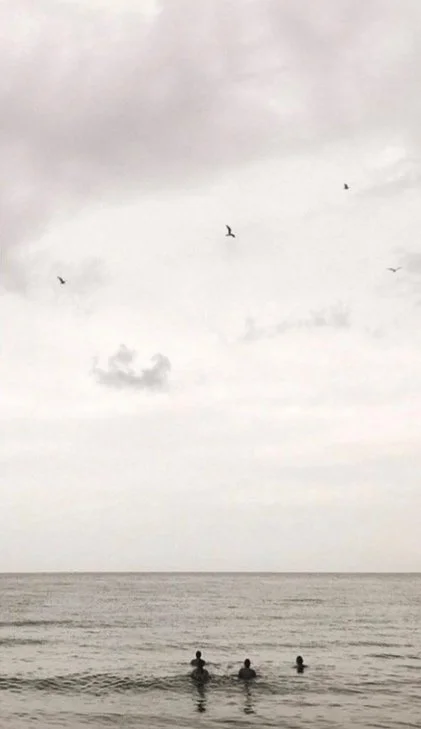
4. TouchReTouch App : for Removing Objects I discovered this app a while back when I was trying to remove a distracting person from the background of an otherwise beautiful moment with my son, who was seeing the beach for the first time. You know those shots, where you think “Ugh! This would have been a perfect shot but this (person/sign/car) is an eyesore!” Not everyone has access or knowledge in Photoshop, and sometimes we just need a quick fix. Enter the TouchRe-Touch app, that will allow you to remove the person/object/whathave you, right from your phone! Either use the brush or lasso tool, and in less than ten seconds, it can be removed. It does cost $1.99 but if you are running into this issue more often than not, it may be worth the purchase for you!
It also comes with tutorials that give step by step guides. This may not be something you use on a daily basis, but it certainly gives you some options when you need it!
(Looking at you mamas, who are forever wishing that toy or pile of laundry wasn't in the background!)

(Top left: BEFORE, Top Right: DURING, Bottom: AFTER)
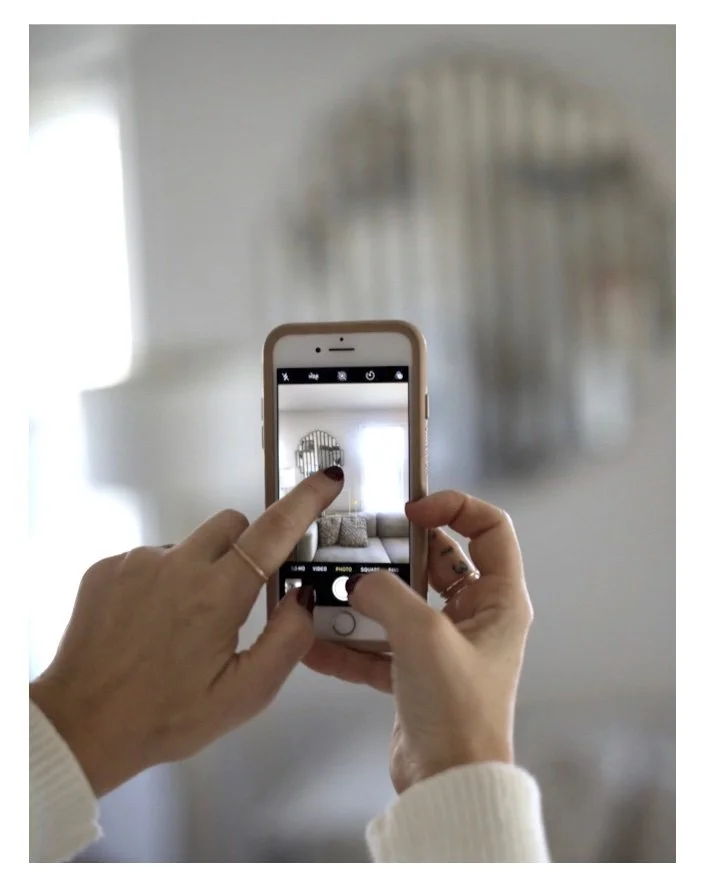
5. AE/AF LOCK FOR FOCUS | The amount of frustrated grunts I have let out while trying to keep my phone focused on something is comical and countless. Again, our phones are called smart for a reason and they are in actuality just trying to help us out by shifting their focus when something else comes into frame. But when you dont have the control of locking down a shutter on a camera for example, the AE/AF Lock trick can save you from making those same discouraged sounds.
Simplyy hold down the spot that you want focused (shown here). Tap the screen on the object, hold your finger down for a couple of seconds and you will see that ‘AE/AF Lock’ read on the screen. This means that even if you move your camera around the scene slightly, it will keep what you chose in focus. And bonus part? You can implement that slide/exposure trick here, too! Once you have your focal point locked in, take it a step further by tweaking the exposure to get the kind of lighting you want. Your phone cannot guess this for you (well, yet anyway!) so you still have control and creativity!

YOU’RE ALL SET!
I truly hope that these go-to tips that I've come to love can help you feel empowered, excited, and less intimidated to getting quality photos, right from your phone! If you are looking to elevate your brand by having a consistent feed, or simply want to print photos from vacation for your fridge that you enjoy looking at just a little bit more, may these five tricks help you to do just that!